How to Configure Namecheap DNS for Custom Fastmail Email Address
August 27, 2018 | Jameson ZimmerHere are instructions on how to set up a Fastmail email address at a custom domain hosted by Namecheap (myname@mywebsite.com). I found the instructions for setting up custom MX records on the Fastmail website had some missing information for Namecheap hosted domains. (See Fastmail instructions for Namecheap DNS here.)
I’m not deeply familiar with how DNS settings work, and this is probably the case for many people migrating away from Gmail surveillance to a more private email setup. Eventually I figured it out, so I figured I should post my findings for other people who, like myself, aren’t deeply familiar with the nuts and bolts of DNS and just want to follow a step-by-step setup.
Note that these instructions are for Namecheap-hosted domains for Fastmail email service only. Fastmail already has setup options for Google Suite and Zoho email addresses at custom domains that are documented well on their site. These instructions are only for nameservers hosted with Namecheap, which requires you to point MX records to FastMail.
- Add your custom domain in the Fastmail domain settings.
- Configure Namecheap DNS for your custom domain.
- Check that Fastmail domain settings for confirmation that everything is set up properly.
Add your custom domain in the Fastmail domain settings
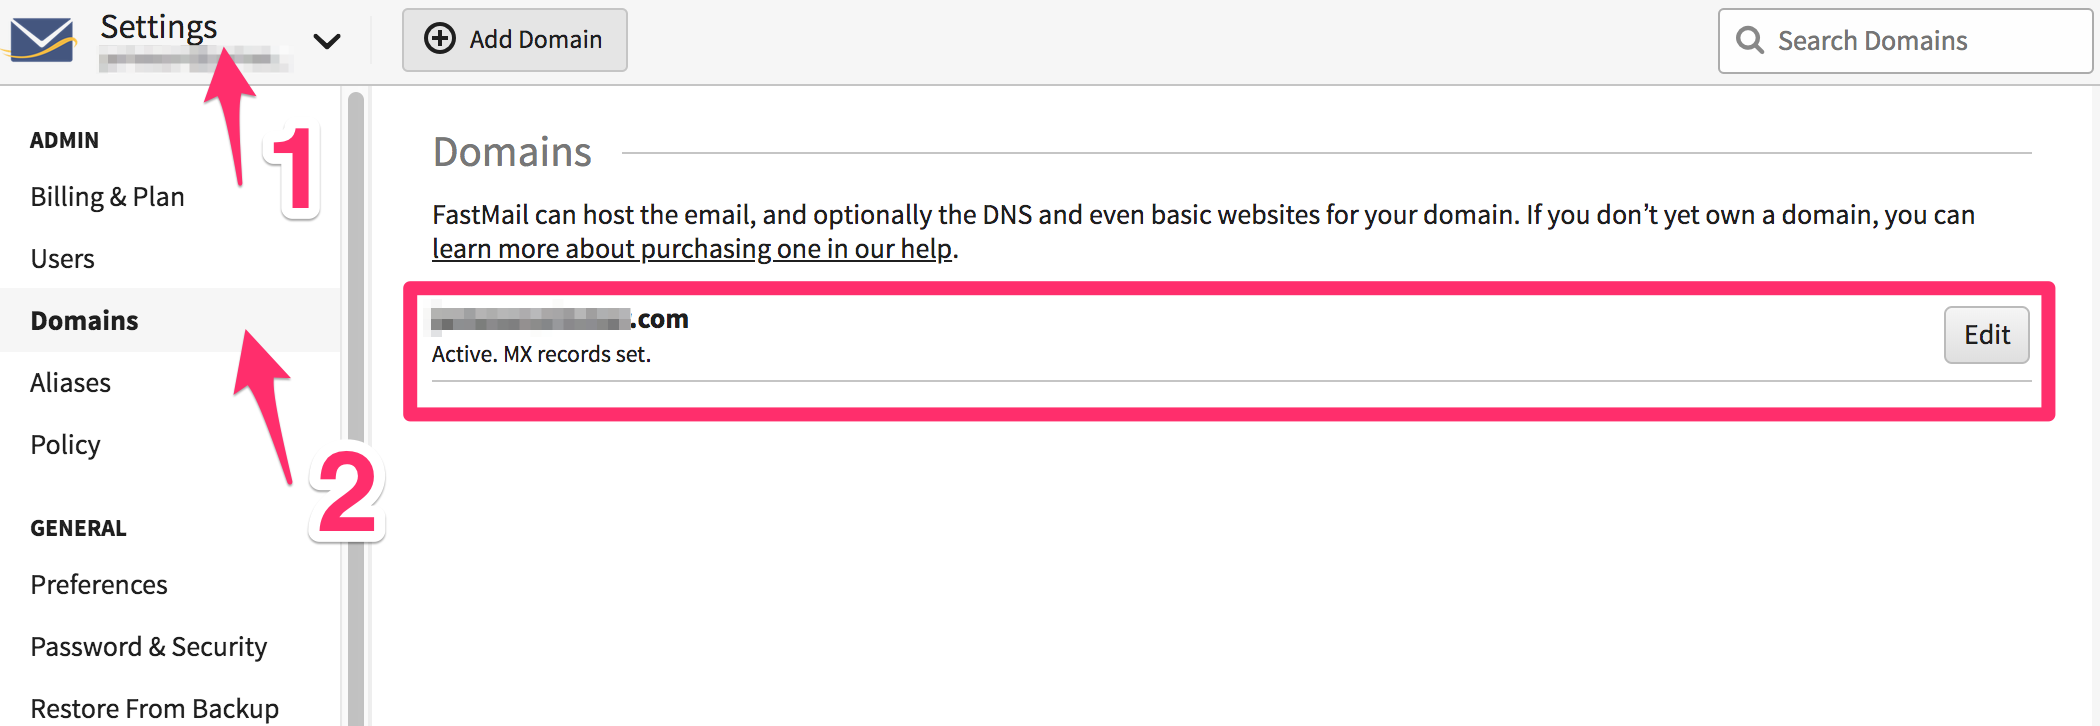
Mail > Settings > Domains.
If you signed up for Fastmail with a custom domain, this should already be entered automatically. I will look like this (except without the “MX records set” text.):

If your custom domain is not automatically entered, simply click the “Add Domain” button and enter your custom domain like this:
yourdomain.com
Configure Namecheap DNS for your custom domain.
There are two steps to the process of configuring your DNS records in the Namecheap dashboard for Fastmail.
- Set MX records for domain
- Set Host records for domain
Both of these DNS settings can be found in the “advanced DNS” section when managing your Namecheap domains.
Setting up MX records
Sign into your Namecheap account and navigate to the “Advanced DNS” settings for you domain:
Domain List > yourdomain.com MANAGE button > Advanced DNS
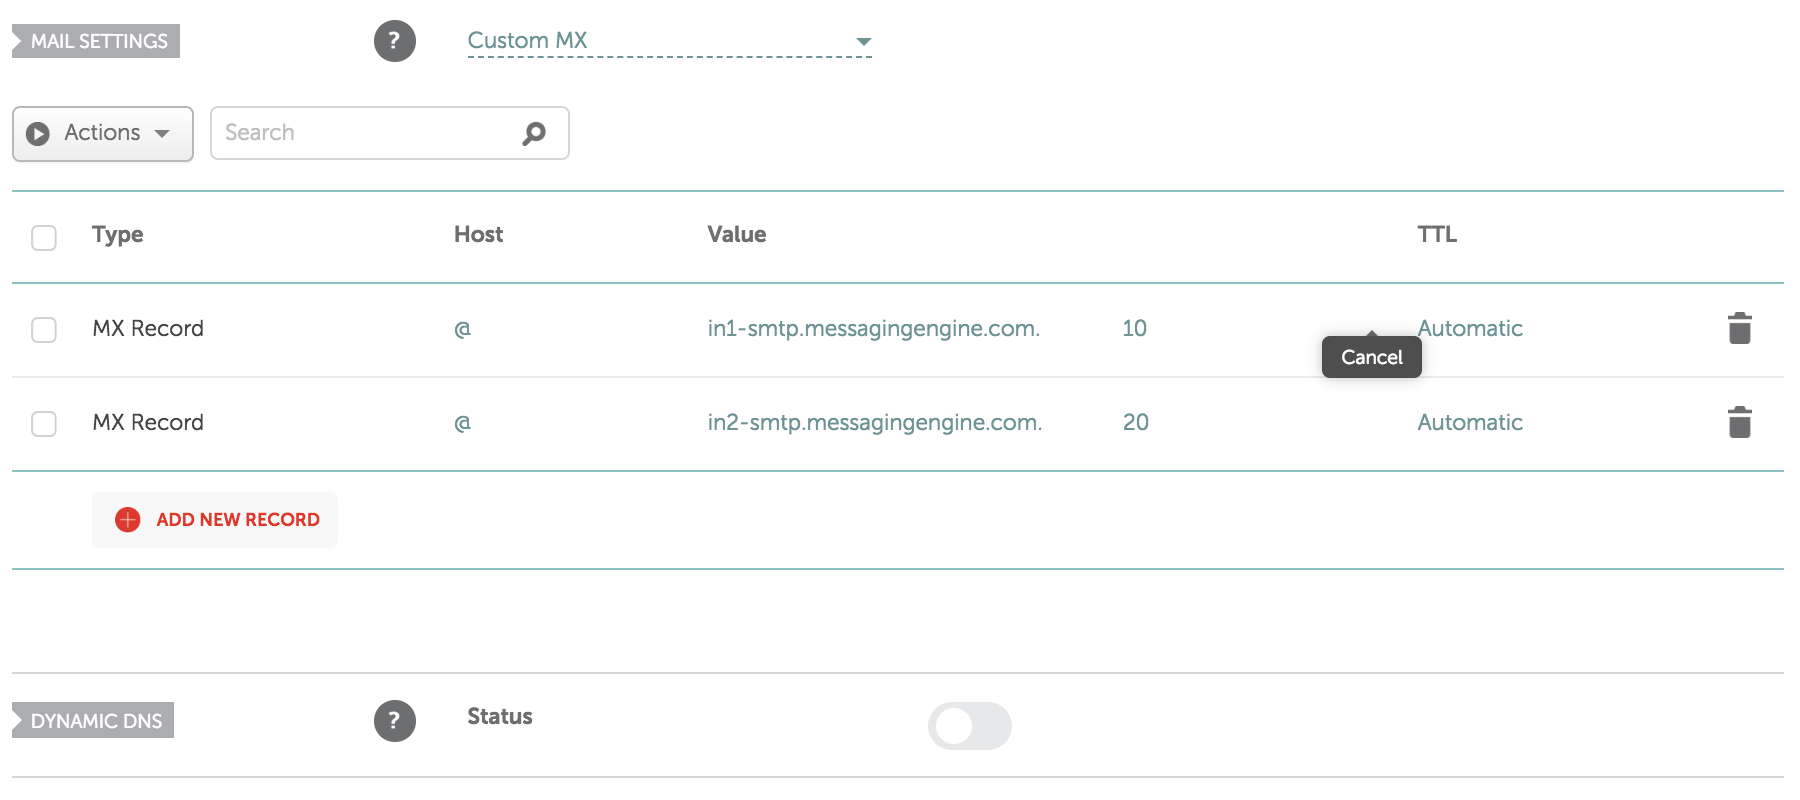
Scroll down the page and you’ll see a “Mail Settings” section. Click the dropdown menu and select “Custom MX.” (Highlighted in screenshot below.)
Here are the entries you will need to add:
| Type | Host | Value | TTL | |
|---|---|---|---|---|
| MX Record | @ | in1-smtp.messagingengine.com. | 10 | Automatic |
| MX Record | @ | in2-smtp.messagingengine.com. | 20 | Automatic |
Note that the . at the end of the value entries is required, but Namecheap will add it automatically if you don’t add period at the end.
When you have set this up properly, it should look exactly like this:

Setting up Host records
Fastmail will work with only MX records set. However, they recommend setting up SPF and DKIM as well to ensure your emails send properly and are not marked as spam.
Without getting too technical, here are the reasons why you should bother with this step:
- SPF: SPF (Sender Policy Framework) was a method of preventing email spoofing that never really worked that well. Unfortunately, some email clients see SPF failures as a sign of spam. Basically, you should set SPF so that other email clients don’t interpret your emails as spam and send them to the spam folder.
- DKIM: DKIM (Domainkeys Identified Email) is a way of associating or “signing” your email with your domain rather than the generic “messagingingine.com” domain. If you don’t set up DKIM, emails you send to Gmail addresses will display a “sent via messagingenging.com” warning next to your email that makes it appear suspicious.
To set these up, you’ll need to add the following records to the “Host Records” section of your Namecheap “Advanced DNS” area (Replace “yourdomain.com” with your domain):
| Type | Host | Value | TTL |
|---|---|---|---|
| TXT Record | @ | v=spf1 include:spf.messagingengine.com ?all | Automatic |
| CNAME Record | fm1._domainkey | fm1.yourdomain.com.dkim.fmhosted.com. | Automatic |
| CNAME Record | fm2._domainkey | fm2.yourdomain.com.dkim.fmhosted.com. | Automatic |
| CNAME Record | fm3._domainkey | fm3.yourdomain.dkim.fmhosted.com. | Automatic |
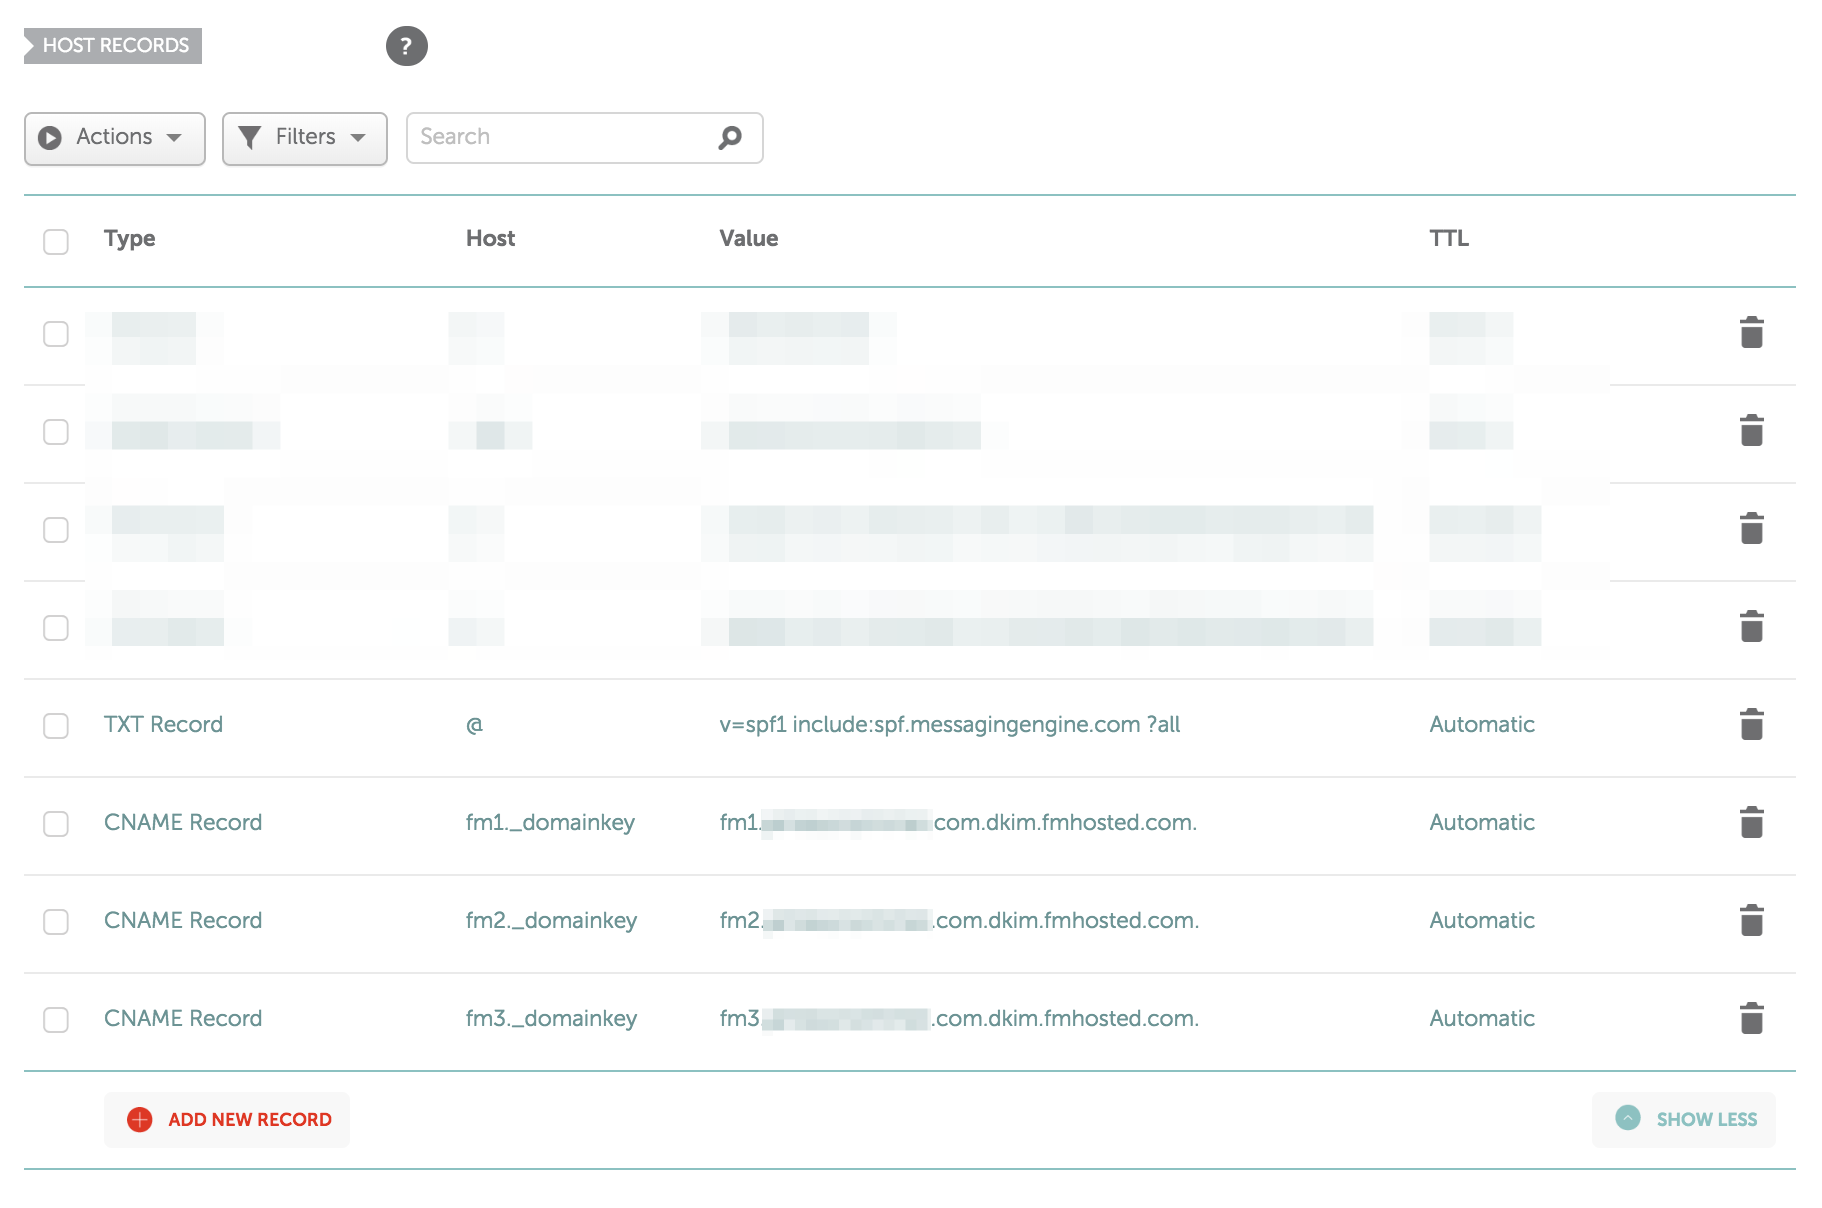
When finished, it should look something like this:

Check everything is working
Finally, the last step is to make sure Fastmail is seeing your DNS updates and confirm everything is working as intended.
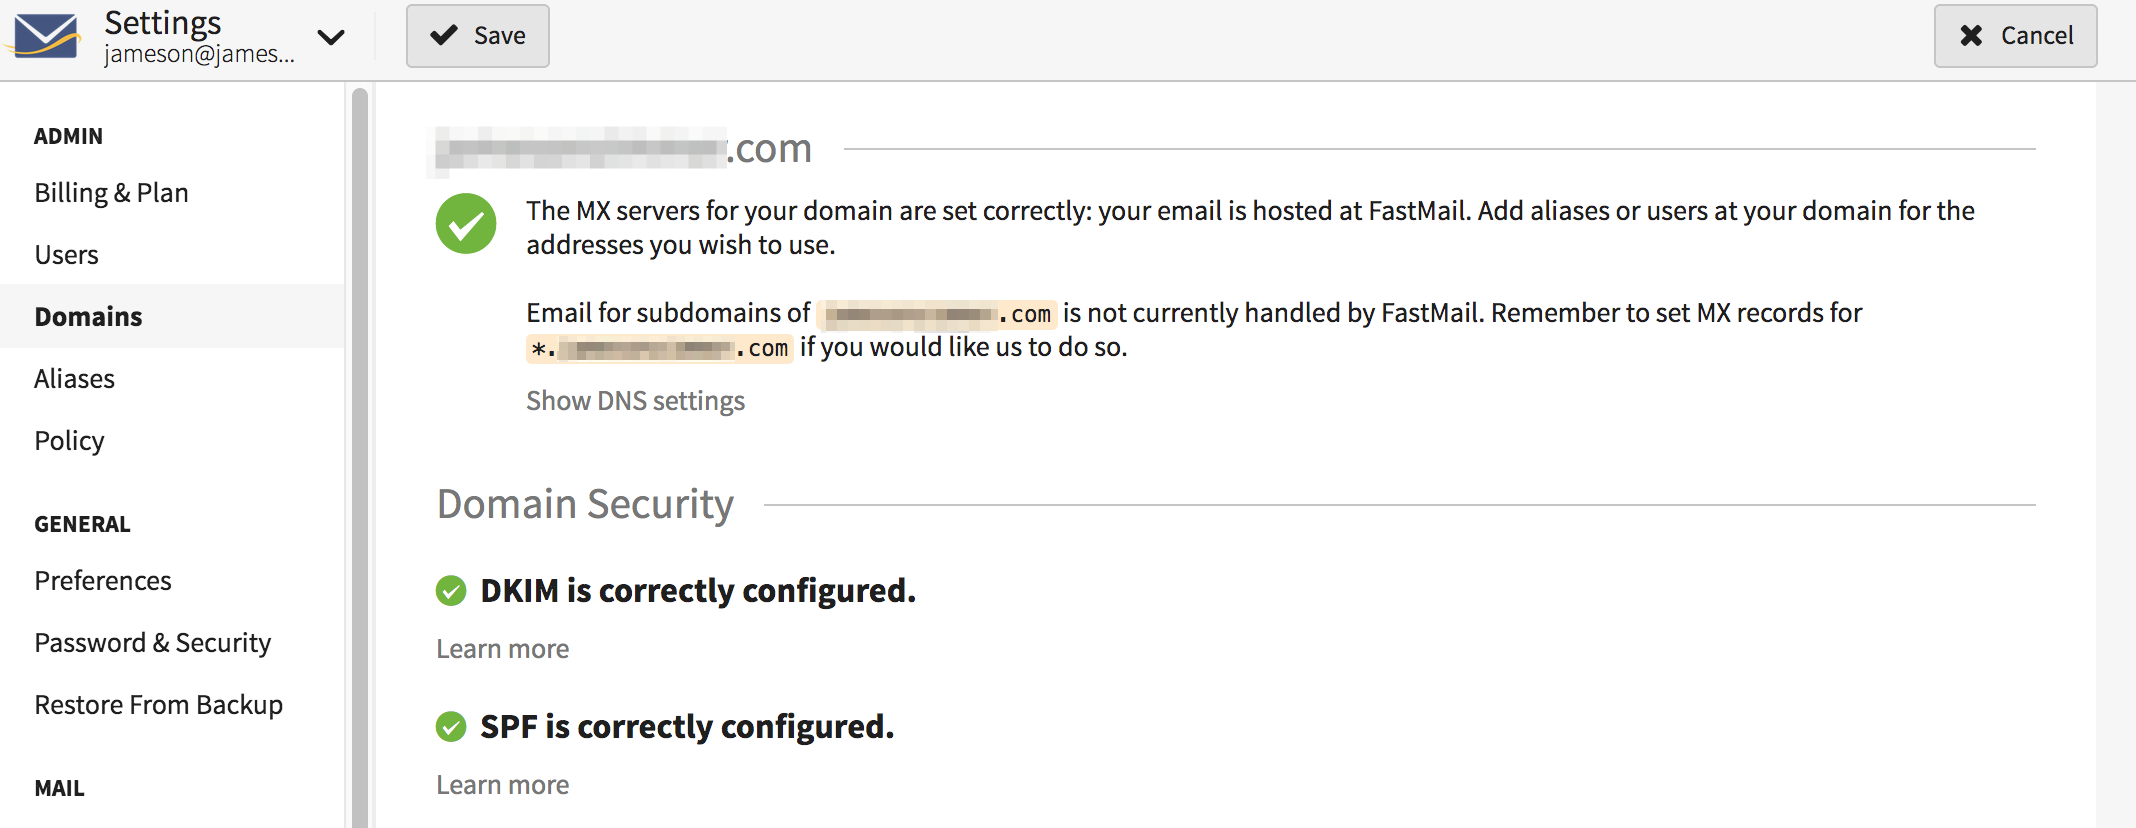
Settings > Domains > Edit
You should see three big green checkmarks for each of the items you just completed:

Within a few minutes (up to a few hours in some cases) you should be able to send and receive emails with any other address, and your emails should display in recipient inboxes with no flags or warnings. In my case, everything was working within ten minutes.
Feel free to send an email to me at jameson@jamesonzimmer.com if you want to test your new Fastmail/Namecheap address!